I was invited to AI Field Day 4 in Santa Clara last week to present a couple of talks on running AI workloads on Intel AMX CPUs. This is a recording of the talk I did on setting up Tanzu Kubernetes for running workloads that use Intel AMX CPUs.
I was invited to AI Field Day 4 in Santa Clara last week to present a couple of talks on running AI workloads on Intel AMX CPUs. This is a recording of the talk I did on running LLMs.
Full disclosure: I used to work for a startup called Bitfusion, and that startup was bought by VMware, so I now work for VMware. At Bitfusion we developed a technology for accessing hardware accelerators, such as NVIDIA GPUs, remotely across networks using TCP/IP, Infiniband, and PVRDMA. Although I still do some work on the Bitfusion product at VMware, I spend most of my time these days seeing what I can do on the vSphere platform using the latest AI/ML accelerator hardware from NVIDIA, Intel, and AMD.
Although I work at VMware, this is my own personal blog, and any views, opinions, or mistakes I publish here are purely my own and are not official views or recommendations from VMware.
Everyone wants the latest, greatest GPUs for AI/ML training and inference workloads. As I’m sure most of you know, GPUs are just specialized matrix processors. They can quickly perform mathematical operations — in parallel — on matrices of numbers. Although GPUs were originally designed for graphics, it turns out that being able to do matrix math is extremely useful for AI/ML.
Unfortunately, every GPU vendor on the planet seems to be having about a one year order backlog when it comes to shipping datacenter-class GPUs. If you’re having a hard time buying GPUs, one thing you can do to increase the performance of your AI/ML workloads is to let the CPU’s AMX instructions do some of that AI/ML work, lessening the need for expensive and hard-to-procure GPUs.
Advanced Matrix Extensions (AMX) are a new set of instructions available on x86 CPUs. These instructions are designed to work on matrices to accelerate artificial intelligence and machine learning -related workloads. These instructions are beginning to blur the lines between CPUs and GPUs when it comes to machine learning applications.
When I started hearing that Intel Sapphire Rapids CPUs were embedding matrix operations in the CPU’s instruction set I started wondering what can I do with those instructions using AI/ML tools?
“We can do good inference on Skylake, we added instructions in Cooper Lake, Ice Lake, and Cascade Lake. But AMX is a big leap, including for training.”
— Bob Valentine, the processor architect for Sapphire Rapids
.
As you replace older hosts with Sapphire Rapids -based hosts you not only get performance improvements for traditional computing, you also get AMX capabilities for AI/ML workloads. You can execute diverse AI & non-AI multi-tenant workloads side by side in a virtualized environment. You have the flexibility to repurpose the IT infrastructure for AI and non-AI use cases as demand changes without additional capex. The ubiquity of Intel Xeon & vSphere in on-Prem and cloud environments, combined with an optimized AI software stack, allows you to quickly scale the compute in hybrid environments. You can run your entire end to end AI pipeline — data prep, training, optimization, inference – using CPUs with built-in AI acceleration.
Does this really work? What kind of workloads can I run?
Here’s a demo I did using an llm-foundry LLM with a 7B parameter model from HuggingFace. The code is installed in a container and the model is loaded in a Kubernetes volume. I first start the LLM in a Tanzu cluster on an Ice Lake CPU -based system with no GPUs. As you can see it takes a while just to load the model into memory, then when it starts it’s pretty jerky and slow.
I start the same exact container on Tanzu cluster running on a Sapphire Rapids CPU -based system with no GPUs. The hardware is roughly equivalent (both are using what would be considered mid-range servers at the time they were purchased), the VMs are equivalent in memory and vCPUs, but the Sapphire Rapids system runs much faster than the previous generation Ice Lake system.
LLM running on Sapphire Rapids with AMX
In addition to the above side-by-side comparison of an LLM running on Ice Lake vs Sapphire Rapids, we also fine-tuned an LLM using just Sapphire Rapids CPUs. Starting with an off-the-shelf LLAMA2-7B model, we fine-tuned it with a dataset “Finance-Alpaca” of about 17,500 queries. We used cnvrg.io to manage the AI pipeline and Pytorch distributed fine-tuning. It took about 3.5 hours to complete on a 4 VM Tanzu cluster with Sapphire Rapids Xeon 4 hardware.
Once the model was fine-tuned with financial data we ran 3 chatbots on a single host. Now that the model was fine-tuned we could ask it questions such as “What is IRR?”, “What in NPV?”, “What is the difference between IRR and NPV?” and get correct and detailed answers back from the LLM.
3 Finance Chatbots running on Sapphire Rapids with AMX
We just took an off-the-shelf LLM, fine-tuned it with financial services information in about 3.5 hours, and now we have a chatbot that can answer basic questions about finance and financial terms. No GPUs were used to do any of this.
You may not want to run every ML workload you have on just CPUs, but there are a lot of them that you can run on just CPUs. Workloads will run even faster with GPUs, but you may not want to pay for GPUs for every workload you run if the speed of a CPU is good enough.
vSphere Requirements for using AMX
If you want to try this in your vSphere environment this is what you’ll need:
Hardware with Sapphire Rapids CPUs.
Guest VMs running Linux kernel 5.16 or later. Kernel 5.19 or later recommended.
Guest VMs using HW version 20 (ESXI 8.0u1, vCenter 8.0u1).
If you’re running Kubernetes, your worker nodes will also need to run Linux kernel 5.16 or later.
Support for AMX was added to the Linux 5.16 kernel, so if you want to use AMX you’ll need to use 5.16 or a later kernel. In my tests for guest VMs I tried Ubuntu 22.04 images with the 5.19 kernel and images using 6.2 kernels, both of which worked fine. Although Ubuntu 22.04 ships with a 5.15 kernel, the 6.2 kernel is available using the hardware enablement (HWE) kernel package that comes with 22.04. The HWE kernel can be installed with apt:
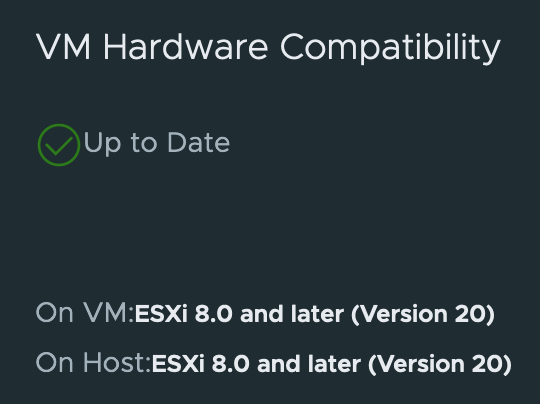
Which capabilities of the underlying hardware are virtualized in vSphere is determined by the hardware version (HW version) of the guest VM. The AMX instructions are virtualized in HW version 20, so if you want to access AMX instructions in vSphere you need to be using HW version 20 on your VMs.
To find out what HW version a VM is using, in vCenter go to the VM, click the Updates tab, and click the CHECK STATUS button.
HW version 20 is supported on ESXI 8.0u1. To run ESXI 8.0u1 you’ll need vCenter 8.0u1. If you’re still running vCenter 7 and you want to try this technology out I suggest that you upgrade to vCenter 8 as soon as you can, then start upgrading ESXI hosts to ESXI 8.
Once you have a Linux VM with a 5.19 kernel (or later) running HW version 20, any AI/ML framework that you run on that VM will have access to the hardware’s AMX instructions. If you run Docker on the VM any AI/ML containers that you run will be running on a the VM’s kernel and will have access to the hardware’s AMX instructions. If the version of the tools that you’re using were compiled to use AMX, they’ll now run faster using the matrix math capabilities of the Sapphire Rapids CPU — no GPUs necessary.
Tanzu Requirements for using AMX
The kernel requirement also applies to Tanzu worker nodes. Whatever kernel is installed on your worker nodes is the kernel that your Kubernetes pods use. To use AMX your Tanzu worker nodes need to be running kernel 5.16 or later.
Tanzu comes with a set of pre-built, automatically-updated node images called Tanzu Kubernetes Releases (TKRs). Each image is an OVA file that deploys a Kubernetes control node or a worker node. A node is just a Linux VM with a specific version of Kubernetes installed on it and a specific Linux kernel.
When you upgrade a Tanzu Kubernetes cluster, say from Kubernetes 1.23 to 1.24, the Tanzu Supervisor Cluster will create a new VM from 1.24 TKR image, wait for it to join the cluster, then it will evacuate, shut down, and delete one of your 1.23 nodes. The Supervisor Cluster repeats this over and over, first replacing your cluster’s control nodes, then replacing the cluster’s worker nodes, until all of the nodes in the cluster are running Kubernetes 1.24.
Note: Kubernetes should only be upgraded from one minor release to the next minor release. If you have a cluster running Kubernetes 1.20 and you want to upgrade to 1.24, you have to first upgrade to 1.21, then 1.22, then 1.23, and finally to 1.24. Skipping a minor version is not recommended and may break your cluster.
VMware publishes two different TKR images for each version of Kubernetes, one based on PhotonOS and one based on Ubuntu.
At this time VMware has not yet published a TKR with a 5.19 (or later) kernel. If you want to start using Sapphire Rapids AMX instructions and you want to use Tanzu Kubernetes, you have two choices:
Wait for the official TKR from VMware with a 5.19 (or later) kernel.
Build your own TKR using the Bring Your Own Image (BYOI) process.
To build an image, follow the instructions on the Github page vSphere Tanzu Kubernetes Grid Image Builder. The process is fairly straightforward. The steps I followed were:
I edited the packer-variables/vsphere.j2 file so it contained information about my vSphere environment. I also created a folder called “BYOI” under my cluster in vCenter and specified that folder in the config, so any “work in progress” images or VMs generated by the BYOI tool would be created in one place.
Make sure you put the correct values for your vSphere environment in the packer-variables/vsphere.j2 file. The first time I tried this I was using another group’s environment to build a TKR, I used the wrong network name, and I spent about 2 hours trying to figure out why the image was erroring out.
I ran make list-versions to get a list of the available versions:
$ make list-versions
            Kubernetes Version  |  Supported OS
              v1.24.9+vmware.1  |  [photon-3,ubuntu-2004-efi]
       v1.25.7+vmware.3-fips.1  |  [photon-3,ubuntu-2004-efi]
I am going to use v1.24.9+vmware.1, so I ran this to download the artifacts:
$ make run-artifacts-container KUBERNETES_VERSION=v1.24.9+vmware.1
Using default port for artifacts container 8081
Error: No such container: v1.24.9---vmware.1-artifacts-server
Unable to find image 'projects.registry.vmware.com/tkg/tkg-vsphere-linux-resource-bundle:v1.24.9_vmware.1-tkg.1' locally
v1.24.9_vmware.1-tkg.1: Pulling from tkg/tkg-vsphere-linux-resource-bundle
2731d8df91a4: Pull complete
73c864854baf: Pull complete
08eb7dea6abf: Pull complete
52654f918c81: Pull complete
da27b4bff06e: Pull complete
797512e2c717: Pull complete
0a994466e4a6: Pull complete
31d1a74dbc07: Pull complete
b3444fea81b1: Pull complete
193c65bff1b1: Pull complete
Digest: sha256:9dcec246657fa7cf5ece1feab6164e200c9bc82b359471bbdec197d028b8e577
Status: Downloaded newer image for projects.registry.vmware.com/tkg/tkg-vsphere-linux-resource-bundle:v1.24.9_vmware.1-tkg.1
26a10c7dea32e04b07e6de760982253b5044ab5a06d1330fef52c5463f19e26c
Customize the TKR OVA Image
The last step is to build the TKR OVA file, but before I build it I want to add two customizations. I need to need to use VM Hardware version (aka “VMX version”) 20 for the OVA, and I need to make sure that we build an Ubuntu OVA with a kernel >= 5.16.
I edit the packer-variables/default-args.j2 file and change the vmx_version:
"vmx_version": "20",
Install a Kernel >= 5.16 on the Image
Earlier when I ran make list-versions I noticed that the v1.24.9+vmware.1 Kubernetes version supports Ubuntu 20.04. However, the only way to get a packaged kernel >= 5.16 installed is to install the Ubuntu 22.04 linux-image-generic-hwe-22.04 package, and vsphere-tanzu-kubernetes-grid-image-builder does not currently have a base image for 22.04.
Since I need 22.04, and 20.04 is the only version available, I’m going to force Packer to do a release upgrade before generating the OVA. To do that I’m going to install the jammy-updates repo from 22.04. When I do that, the vSphere Tanzu Kubernetes Grid Image Builder will cause Packer to upgrade the image to Ubuntu 22.04 and I can then install the Ubuntu 22.04 linux-image-generic-hwe-22.04 package.
I create a file ansible/files/repos/ubuntu.list which contains the lines:
deb http://us.archive.ubuntu.com/ubuntu/ jammy-updates main restricted
deb http://security.ubuntu.com/ubuntu jammy-security main restricted
deb http://us.archive.ubuntu.com/ubuntu/ jammy main restricted
I create the file packer-variables/repos.j2 which contains:
Doing all of that will add the jammy-updates repo to the TKR image. Now to add the kernel package I go back to the same packer-variables/default-args.j2 file we were editing earlier, I look for the extra_debs line and add the HWE kernel package for Ubuntu 22.04, linux-image-generic-hwe-22.04:
Now that I’ve made those changes I can build the TKR OVA.
Build the Image
The main Github README page says I can run make build-node-image to build the OVA, but I want to use a specific version of Kubernetes and I want to use Ubuntu 20.04, so I assume I need to pass some extra parameters to make. Typing make help gives me all of the information I need to construct the right build command:
IP=[my VM's IP address, where the artifact container is running]
make build-node-image \
    OS_TARGET=ubuntu-2004-efi \
    KUBERNETES_VERSION=v1.24.9+vmware.1 \
    TKR_SUFFIX=spr \
    HOST_IP=$IP \
    IMAGE_ARTIFACTS_PATH=${HOME}/image
This takes a while to run and will create and configure a VM on your vSphere cluster that will be used to create the TKR OVA image. If you want to watch the build, run the docker logs command that make build-node-image spits out:
When the process is done you should have an image file named ${HOME}/image/ovas/ubuntu-2004-amd64-v1.24.9---vmware.1-spr.ova
Add the Image to a local Content Library
In order for Tanzu to be able to use the image it has to be added to a local content library. If you don’t have a local content library create one by going to vSphere Client > Content Libraries > Create.
Once you’ve created the library click the library name to pull it up on the screen and click Actions > Import Item. Upload the ubuntu-2004-amd64-v1.24.9---vmware.1-spr.ova file.
Associate the Content Library with the Cluster Namespace
Go to vSphere Client > Workload Management > “your cluster namespace”, then click MANAGE CONTENT LIBRARIES on the VM Service tile. Make sure that the local library, and any other libraries used by your Cluster Namespace, are checked.
Deploy Your Own Image
To create a Kubernetes cluster you create a YAML file and run kubectl on in. The following YAML file builds a cluster based on the ubuntu-2004-amd64-v1.24.9---vmware.1-spr.ova TKR image, which is based on Ubuntu 20.04 and contains Kubernetes 1.24.9 and a Linux HWE kernel (currently kernel 6.2).
For a stable, easily-upgradable cluster I recommend a minimum of 3 control plane nodes and 3 worker nodes.
The metadata section’s annotations line must be present to use an Ubuntu TKR as the base image.
The TKR reference just refers to the first part of the TKR’s file name. You can see the TKR file names by looking in the vCenter Content Library you set up for Tanzu. To get a list of valid reference names: kubectl config use-context $my-tanzu-kubernetes-cluster-namespace kubectl get tanzukubernetesreleases Only the names that have READY=True and COMPATIBLE=True can be used to deploy a cluster.
In order to allocate a separate, larger volume for storing docker images on the worker nodes I added a volumes section. I have a storage class defined named vsan-default-storage-policy and the volumes section will allocate a 160GiB volume using the disk specified by vsan-default-storage-policy and mount it on the worker node using the path /var/lib/containerd, which is where container images are stored. Change vsan-default-storage-policy to the name of a storage policy defined for your tanzu-kubernetes-cluster-namespace if you want this to work on your system.
Since images are downloaded as needed, the containerd volume will be destroyed when a worker node is destroyed. It will be destroyed and recreated (empty) when a worker node is upgraded.
I recommend deploying a fresh cluster using this YAML file just so you can try it out and see how it works. Once you’ve deployed a new cluster any AI/ML containers that you run will be running on a 6.2 kernel and will have access to the hardware’s AMX instructions. If the version of the tools that you’re using were compiled to use AMX, they’ll now run faster using the matrix math capabilities of the Sapphire Rapids CPU — no GPUs necessary.
Upgrading an existing Tanzu Kubernetes cluster to the new TKR image
To upgrade an existing Tanzu Kubernetes 1.23 cluster to 1.24 using the new TKR image:
Modify the existing 1.23 cluster’s YAML file to refer to the v1.24.9---vmware.1-spr TKR image.
Make sure that the YAML file has the annotations line so the Supervisor will deploy an Ubuntu-based TKR.
This will pull up a system editor (vim on my system) containing the cluster’s freshly-generated current YAML file. Make the changes and save the file. Any changes you make will be applied immediately when you save the file.
Check the deployed cluster VMs
You can ssh into a cluster’s VMs and check the kernel version running and verify that you can see the amx flags for the CPUs, indicating that the extra instructions are accessible. In vCenter find one of the cluster’s VMs and get the IP address. To get the ssh password:
With these instructions you should now be able to create VMs and Kubernetes clusters that can access Sapphire Rapids AMX instructions. Any AI/ML framework that you run will have access to the hardware’s AMX instructions. If the version of the tools that you’re using were compiled to use AMX, they’ll now run faster using the matrix math capabilities of the Sapphire Rapids CPU — no GPUs necessary.
Type=oneshot means that the command runs once. Normally since this is a oneshot service the service would exit after the ExecStart command runs, but since I don’t want to do anything when the service starts, there is is no ExecStart command. That’s why I use RemainAfterExit=yes, which keeps the service running even though there’s no ExecStart command.
Finally I use ExecStop to run the command at shutdown time.
After=syslog.service network.target ensures that the ec2-cleanup.service doesn’t start until after syslog service is running and the network has started. More importantly, since systemd stops services in the reverse order that they’re started, this also ensures that syslog and the network service are still running when systemd runs the ec2-cleanup.service‘s ExecStop command.
Although there are many different available syslog services, most use “syslog” as a service alias, so After=syslog.service should work regardless of which syslog service you actually use. (e.g. If you use rsyslogthis still works, because rsyslog declares syslog as an alias.)
Finally, I just needed to install the service on my AWS VMs, so I added this to an Ansible playbook that runs on my AWS VMs:
  - name: Install the ec2-cleanup.sh script
    copy:
      src: ec2-cleanup.sh
      dest: /usr/local/sbin/ec2-cleanup.sh
      owner: root
      group: root
      mode: 0755

  - name: Install a service to run ec2-cleanup.sh at shutdown
    copy:
      src: ec2-cleanup.service
      dest: /lib/systemd/system/ec2-cleanup.service
      owner: root
      group: root
      mode: 0644
    register: ec2_cleanup_service

  - name: Restart ec2-cleanup service if the service file changed
    systemd:
      name: ec2-cleanup
      daemon_reload: True
      state: restarted
    when: ec2_cleanup_service.changed

  - name: Enable ec2-cleanup service so it starts on boot
    systemd:
      name: ec2-cleanup
      enabled: True
      state: started
To verify that all of this works I ran the Ansible playbook on a VM, then logged in and checked the status of the service:
eruby@i-056ac231adeb1f930:~$ systemctl status ec2-cleanup
● ec2-cleanup.service - Run cleanup at shutdown
     Loaded: loaded (/lib/systemd/system/ec2-cleanup.service; enabled; vendor preset: enabled)
     Active: active (exited) since Tue 2023-03-14 17:04:37 UTC; 44s ago

Mar 14 17:04:37 i-056ac221aceb1f830 systemd[1]: Finished Run cleanup at shutdown.
The service is active (exited), which I expected (exited because ExecStart has completed, active because RemainAfterExit=yes is keeping the service running until shutdown.
If I reboot the VM and log back in I can check syslog with:
journalctl -u ec2-cleanup.service -n 20
… and see the last 20 lines of output from the script. The log output shows that the script ran when I rebooted.
After the latest updates to the code these scripts now create VMs from full Linux distros in a few seconds.
I was looking for a way to automate the creation of VMs for testing various distributed system / cluster software packages. I’ve used Vagrant in the past but I wanted something that would:
Allow me to use raw image files as the basis for guest VMs.
Guest VMs should be set up with bridged IPs that are routable from the host.
Guest VMs should be able to reach the Internet.
Other hosts on the local network should be able to reach guest VMs. (Setting up additional routes is OK).
VM creation should work with any distro that supports cloud-init.
Scripts should be able to create and delete VMs in a scripted, fully-automatic manner.
Guest VMs should be set up to allow passwordless ssh access from the “ansible” user, so that once a VM is running Ansible can be used for additional configuration and customization of the VM.
The current version of the create-vm script uses cloud images, cloud-init, and virsh tooling to quickly create VMs from the command line. Using a single Linux host system you can create multiple guest VMs running on that host. Each guest VM has its own file system, memory, virtualized CPUs, IP address, etc.
Cloud Images
create-vm creates a QCOW2 file for your VM’s file system. The QCOW2 image uses the cloud image as a base filesystem, so instead of copying all of the files that come with a Linux distribution and installing them, QCOW will just use files directly from the base image as long as those files remain unchanged. QCOW stands for “QEMU Copy On Write”, so once you make a change to a file the changes are written to your VM’s QCOW2 file.
Cloud images have the extension .img or .qcow and are compiled for different system architectures.
Cloud images are available for the following distros:
Pick the base image for the distro and release that you want to install and download it onto your host system. Make sure that the base image uses the same hardware architecture as your host system, e.g. “x86_64” or “amd64” for Intel and AMD -based host systems, “arm64” for 64 bit ARM-based host systems.
cloud-init configuration
cloud-init reads in two configuration files, user-data and meta-data, to initialize a VM’s settings. One of the places it looks for these files is any attached disk volume labeled cidata.
The create-vm script creates an ISO disk called cidata with these two files and passes that in as a volume to virsh when it creates the VM. This is referred to as the “no cloud” method, so if you see a cloud image for “nocloud” that’s the one you want to use.
If you’re interested in other ways of doing this check out the Datasources documentation on for cloud-init.
Files
create-vm stores files as follows:
${HOME}/vms/base/ – Place to store your base Linux cloud images.
${HOME}/vms/images/ – your-vm-name.img and your-vm-name-cidata.img files.
${HOME}/vms/init/ – user-data and meta-data.
${HOME}/vms/xml/ – Backup copies of your VMs’ XML definition files.
QCOW2 filesystems allocate space as needed, so if you create a VM with 100GB of storage, the initial size of the your-vm-name.img and your-vm-name-cidata.img files is only about 700K total. The your-vm-name.img file will grow as you install packages and update files, but will never grow beyond the disk size that you set when you create the VM.
create-vm – Use .img and cloud-init files to auto-generate a VM.
delete-vm – Delete a virtual machine created with create-vm.
get-vm-ip – Get the IP address of a VM managed by virsh.
Host setup
I’m running the scripts from a host with Ubuntu Linux 22.04 installed. I added the following to the host’s Ansible playbook to install the necessary virtualization packages:
If you’re not using Ansible just apt-get install the above packages.
Permissions
The libvirtd daemon runs under the libvirt-qemu user service account. The libvirt-qemu user must be able to read the files in ${HOME}/vms/. If your ${HOME} directory has permissions set to 0x750 then libvirt-qemu won’t be able to read the ${HOME}/vms/ directory.
You could open up your home directory, e.g.:
chmod 755 ${HOME}
… but that allows anyone logged into your Linux host to read everything in your home directory. A better approach is just to add libvirt-qemu to your home directory’s group. For instance, on my host my home directory is /home/earl owned by user earl and group earl, permissions 0x750:
$ chmod 750 /home/earl
$ ls -al /home
total 24
drwxr-xr-x   6 root      root      4096 Aug 28 21:26 .
drwxr-xr-x  21 root      root      4096 Aug 28 21:01 ..
drwxr-x--- 142 earl      earl      4096 Feb 16 09:27 earl
To make sure that only the libvirt-qemu user can read my files I can add the user to the earl group:
That shows that the group earl, group ID 1000, has a member libvirt-qemu. Since the group earl has read and execute permissions on my home directory, libvirt-qemu has read and execute permissions on my home directory.
Note: The libvirtd daemon will chown some of the files in the directory, including the files in the ~/vms/images directory, to be owned by libvirt-qemu group kvm. In order to delete these files without sudo, add yourself to the kvm group, e.g.:
$ sudo usermod --append --groups kvm earl
You’ll need to log out and log in again before the additional group is active.
create-vm options
create-vm supports the following options:
OPTIONS:
   -h      Show this message
   -n      Host name (required)
   -i      Full path and name of the base .img file to use (required)
   -k      Full path and name of the ansible user's public key file (required)
   -r      RAM in MB (defaults to 2048)
   -c      Number of VCPUs (defaults to 2)
   -s      Amount of storage to allocate in GB (defaults to 80)
   -b      Bridge interface to use (defaults to virbr0)
   -m      MAC address to use (default is to use a randomly-generated MAC)
   -v      Verbose
Create an Ubuntu 22.04 server VM
This creates an Ubuntu 22.04 “Jammy Jellyfish” VM with a 40G hard drive.
First download a copy of the Ubuntu 22.04 “Jammy Jellyfish” cloud image:
mkdir -p ~/vms/base
cd ~/vms/base
wget http://cloud-images.ubuntu.com/jammy/current/jammy-server-cloudimg-amd64.img
Once created I can get the IP address and ssh to the VM as the user “ansible”:
$ get-vm-ip node1
192.168.122.219
$ ssh -i ~/.ssh/id_rsa_ansible ansible@192.168.122.219
The authenticity of host '192.168.122.219 (192.168.122.219)' can't be established.
ED25519 key fingerprint is SHA256:L88LPO9iDCGbowuPucV5Lt7Yf+9kKelMzhfWaNlRDxk.
This key is not known by any other names
Are you sure you want to continue connecting (yes/no/[fingerprint])? yes
Warning: Permanently added '192.168.122.219' (ED25519) to the list of known hosts.
Welcome to Ubuntu 22.04.1 LTS (GNU/Linux 5.15.0-60-generic x86_64)

 * Documentation:  https://help.ubuntu.com
 * Management:     https://landscape.canonical.com
 * Support:        https://ubuntu.com/advantage

  System information as of Wed Feb 15 20:05:45 UTC 2023

  System load:  0.47216796875     Processes:             105
  Usage of /:   3.7% of 38.58GB   Users logged in:       0
  Memory usage: 9%                IPv4 address for ens3: 192.168.122.219
  Swap usage:   0%

Expanded Security Maintenance for Applications is not enabled.

0 updates can be applied immediately.

Enable ESM Apps to receive additional future security updates.
See https://ubuntu.com/esm or run: sudo pro status


The programs included with the Ubuntu system are free software;
the exact distribution terms for each program are described in the
individual files in /usr/share/doc/*/copyright.

Ubuntu comes with ABSOLUTELY NO WARRANTY, to the extent permitted by
applicable law.

To run a command as administrator (user "root"), use "sudo <command>".
See "man sudo_root" for details.

ansible@node1:~$ df -h
Filesystem      Size  Used Avail Use% Mounted on
tmpfs           198M 1008K  197M   1% /run
/dev/sda1        39G  1.5G   38G   4% /
tmpfs           988M     0  988M   0% /dev/shm
tmpfs           5.0M     0  5.0M   0% /run/lock
/dev/sda15      105M  6.1M   99M   6% /boot/efi
tmpfs           198M  4.0K  198M   1% /run/user/1000
ansible@node1:~$
Note that this VM was created with a 40GB hard disk, and the total disk space shown is 40GB, but the actual hard drive space initially used by this VM was about 700K. The VM can consume up to 40GB, but will only use the space it actually needs.
Create 8 Ubuntu 22.04 servers
This starts the VM creation process and exits. Creation of the VMs continues in the background.
for n in `seq 1 8`; do
    create-vm -n node$n -i ~/vms/base/jammy-server-cloudimg-amd64.img -k ~/.ssh/id_rsa_ansible.pub
done
Delete 8 virtual machines
for n in `seq 1 8`; do
    delete-vm node$n
done
Connect to a VM via the console
virsh console node1
Connect to a VM via ssh
ssh ansible@$(get-vm-ip node1)
Generate an Ansible hosts file
(
    echo '[hosts]'
    for n in `seq 1 8`; do
        ip=$(get-vm-ip node$n)
        echo "node$n ansible_host=$ip ip=$ip ansible_user=ansible"
    done
) > hosts.ini
Handy virsh commands
virsh list – List all running VMs.
virsh domifaddr node1 – Get a node’s IP address. Does not work with all network setups, which is why I wrote the get-vm-ip script.
virsh net-list – Show what networks were created by virsh.
virsh net-dhcp-leases $network – Shows current DHCP leases when virsh is acting as the DHCP server. Leases may be shown for machines that no longer exist.
We use technologies like cookies to store and/or access device information. We do this to improve browsing experience and to show (non-) personalized ads. Consenting to these technologies will allow us to process data such as browsing behavior or unique IDs on this site. Not consenting or withdrawing consent, may adversely affect certain features and functions.
Functional
Always active
The technical storage or access is strictly necessary for the legitimate purpose of enabling the use of a specific service explicitly requested by the subscriber or user, or for the sole purpose of carrying out the transmission of a communication over an electronic communications network.
Preferences
The technical storage or access is necessary for the legitimate purpose of storing preferences that are not requested by the subscriber or user.
Statistics
The technical storage or access that is used exclusively for statistical purposes.The technical storage or access that is used exclusively for anonymous statistical purposes. Without a subpoena, voluntary compliance on the part of your Internet Service Provider, or additional records from a third party, information stored or retrieved for this purpose alone cannot usually be used to identify you.
Marketing
The technical storage or access is required to create user profiles to send advertising, or to track the user on a website or across several websites for similar marketing purposes.