CockroachDB is new distributed database which, like its namesake, is really hard to kill.
CockroachDB implements SQL DML commands for creating schemas, tables, and indexes using the same syntax as PostgreSQL, and it supports the PostgreSQL wire protocol, meaning that any PostgreSQL database driver or client can be used to connect to a CockroachDB database. If you’re currently using PostgresSQL and you want an easier scale-out, highly-available way to deploy a database, you should take a look at CockroachDB. In many cases you can just repoint your application at a CockroachDB server and your application will run the same as it did using PostgreSQL.
The first day I tried using CockroachDB I got a six-node system up and running using CockroachDB’s Docker image on my Apcera cluster using AWS EFS as a backing store in less than an hour. This is what I did to get it working.
Set up an NFS provider for EFS
I already had an Apcera cluster for deploying Docker images running on AWS. This is the same cluster I used for my article on Mounting AWS EFS volumes inside Docker Containers. In fact, I set up the EFS provider using the same steps:
Set up the EFS volume using the AWS console.
Create an NFS provider that targets the EFS volume.
apc provider register apcfs-ha --type nfs \
    --url "nfs://10.0.0.112/" \
    --description 'Amazon EFS' \
    --batch \
    -- --version 4.1
Create a namespace and a private network
Create a namespace and a private network named “roachnet”.
apc namespace /sandbox/cockroach
apc network create roachnet
“roachnet” is a private VxLAN created by the Apcera platform that only containers that I’ve joined to the network can see.
Create the first CockroachDB node
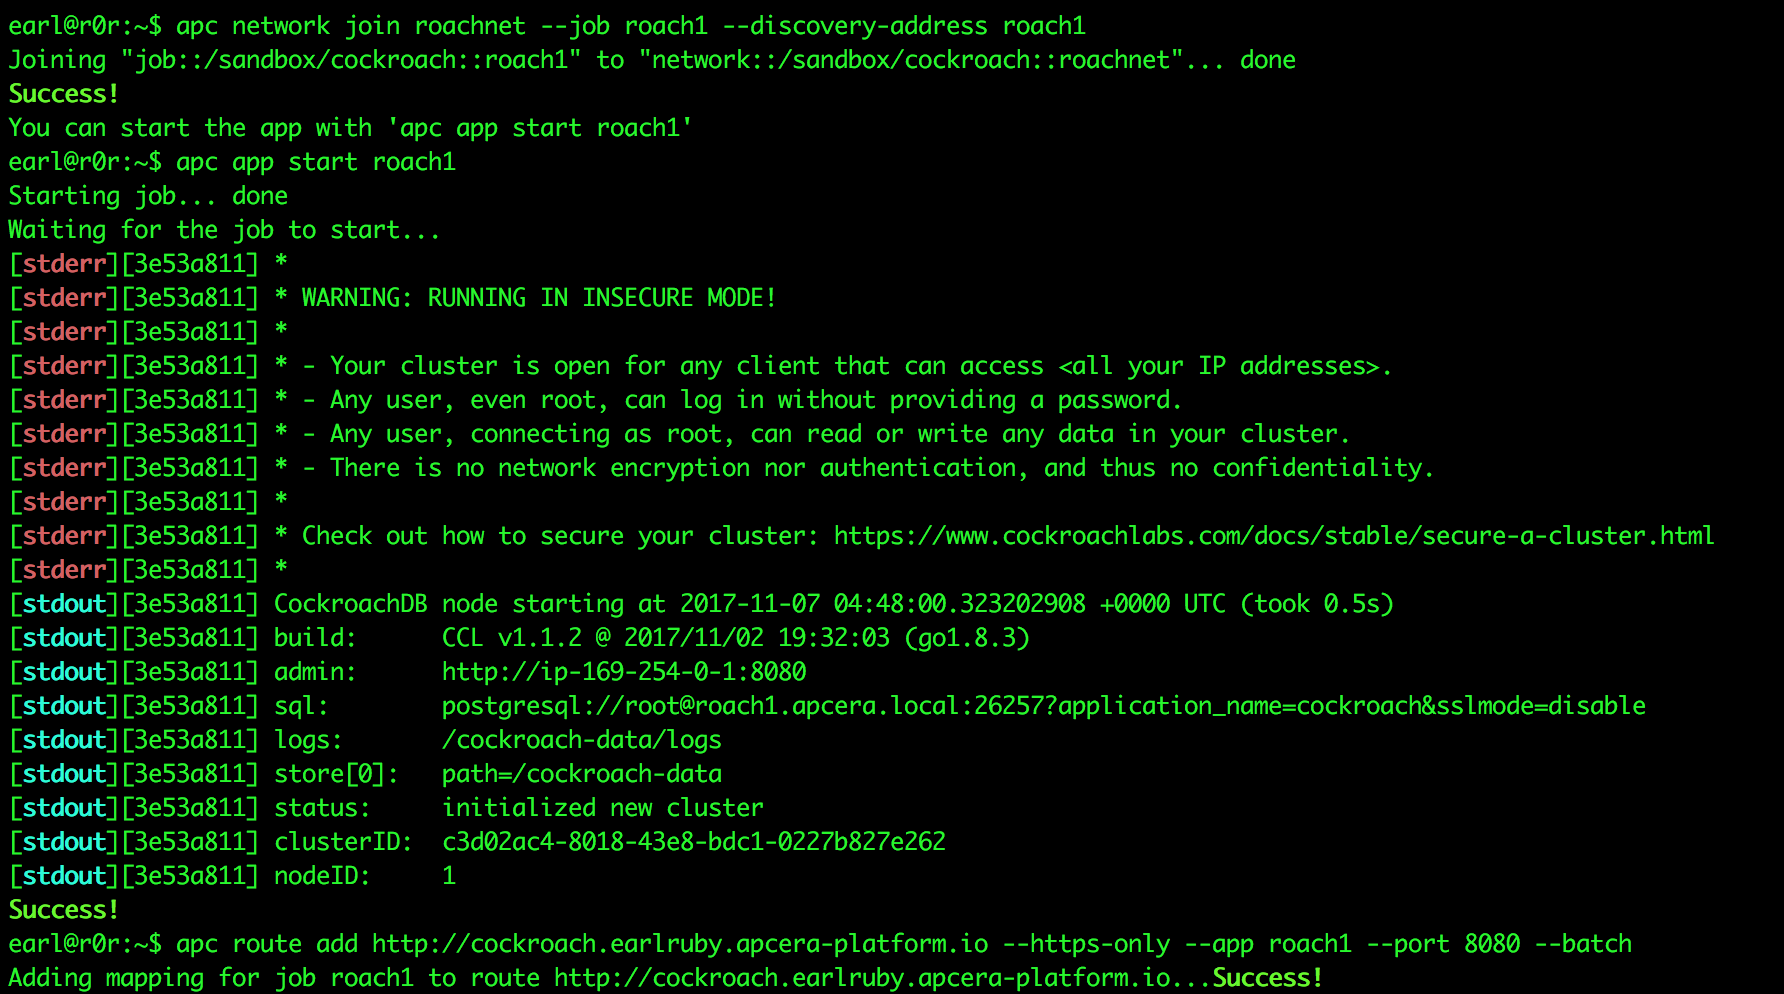
Next I create a container instance called “roach1” from the latest Docker image, open ports 8080 and 26257, tell it to use the EFS provider for storage, and to advertise itself to other CockroachDB nodes so they can find it and join the DB cluster.
apc docker run roach1 --image cockroachdb/cockroach:v1.1.2 --port 8080 --port 26257 --provider /apcera/providers::apcfs-ha --start-cmd "/cockroach/cockroach.sh start --insecure --advertise-host roach1.apcera.local"
apc network join roachnet --job roach1 --discovery-address roach1
apc app start roach1
apc route add http://cockroach.earlruby.apcera-platform.io --https-only --app roach1 --port 8080 --batch
Create 5 more nodes
Create 5 more nodes and add them to roachnet:
for x in `seq 2 6`; do
    apc docker run roach$x --image cockroachdb/cockroach:v1.1.2 --port 8080 --port 26257 --provider  /apcera/providers::apcfs-ha --start-cmd "/cockroach/cockroach.sh start --insecure --join roach1.apcera.local:26257"
    apc network join roachnet --job roach$x --discovery-address roach$x
    apc app start roach$x
    sleep 3
done
I added the “sleep 3” command because when I originally tested this (on CockroachDB 1.1.0) the platform started the containers so fast that the DB got confused and didn’t add all of them to the cluster. All nodes started, but only some joined the cluster. After I added the delay all nodes joined the cluster.
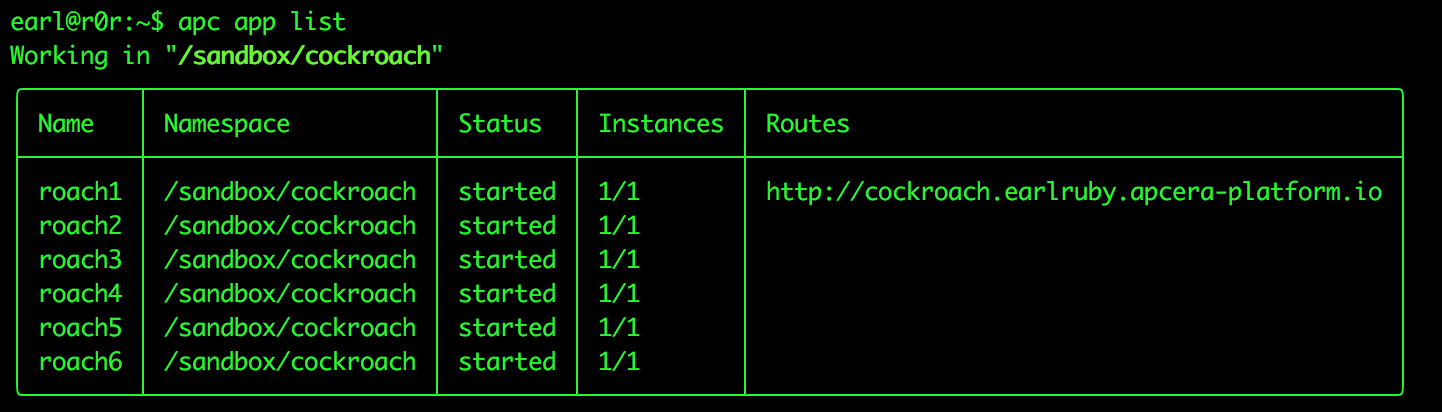
Verify that the containers are all running.:
After that the cluster was up and running. I could connect to the database, create schemas, create tables, add, update, and delete records. I’m pretty happy with the initial results. Next step is automatically generating secure certificates so I’m not operating in insecure mode, then I’m going to run actual applications against the cluster.
Hope you found this useful.
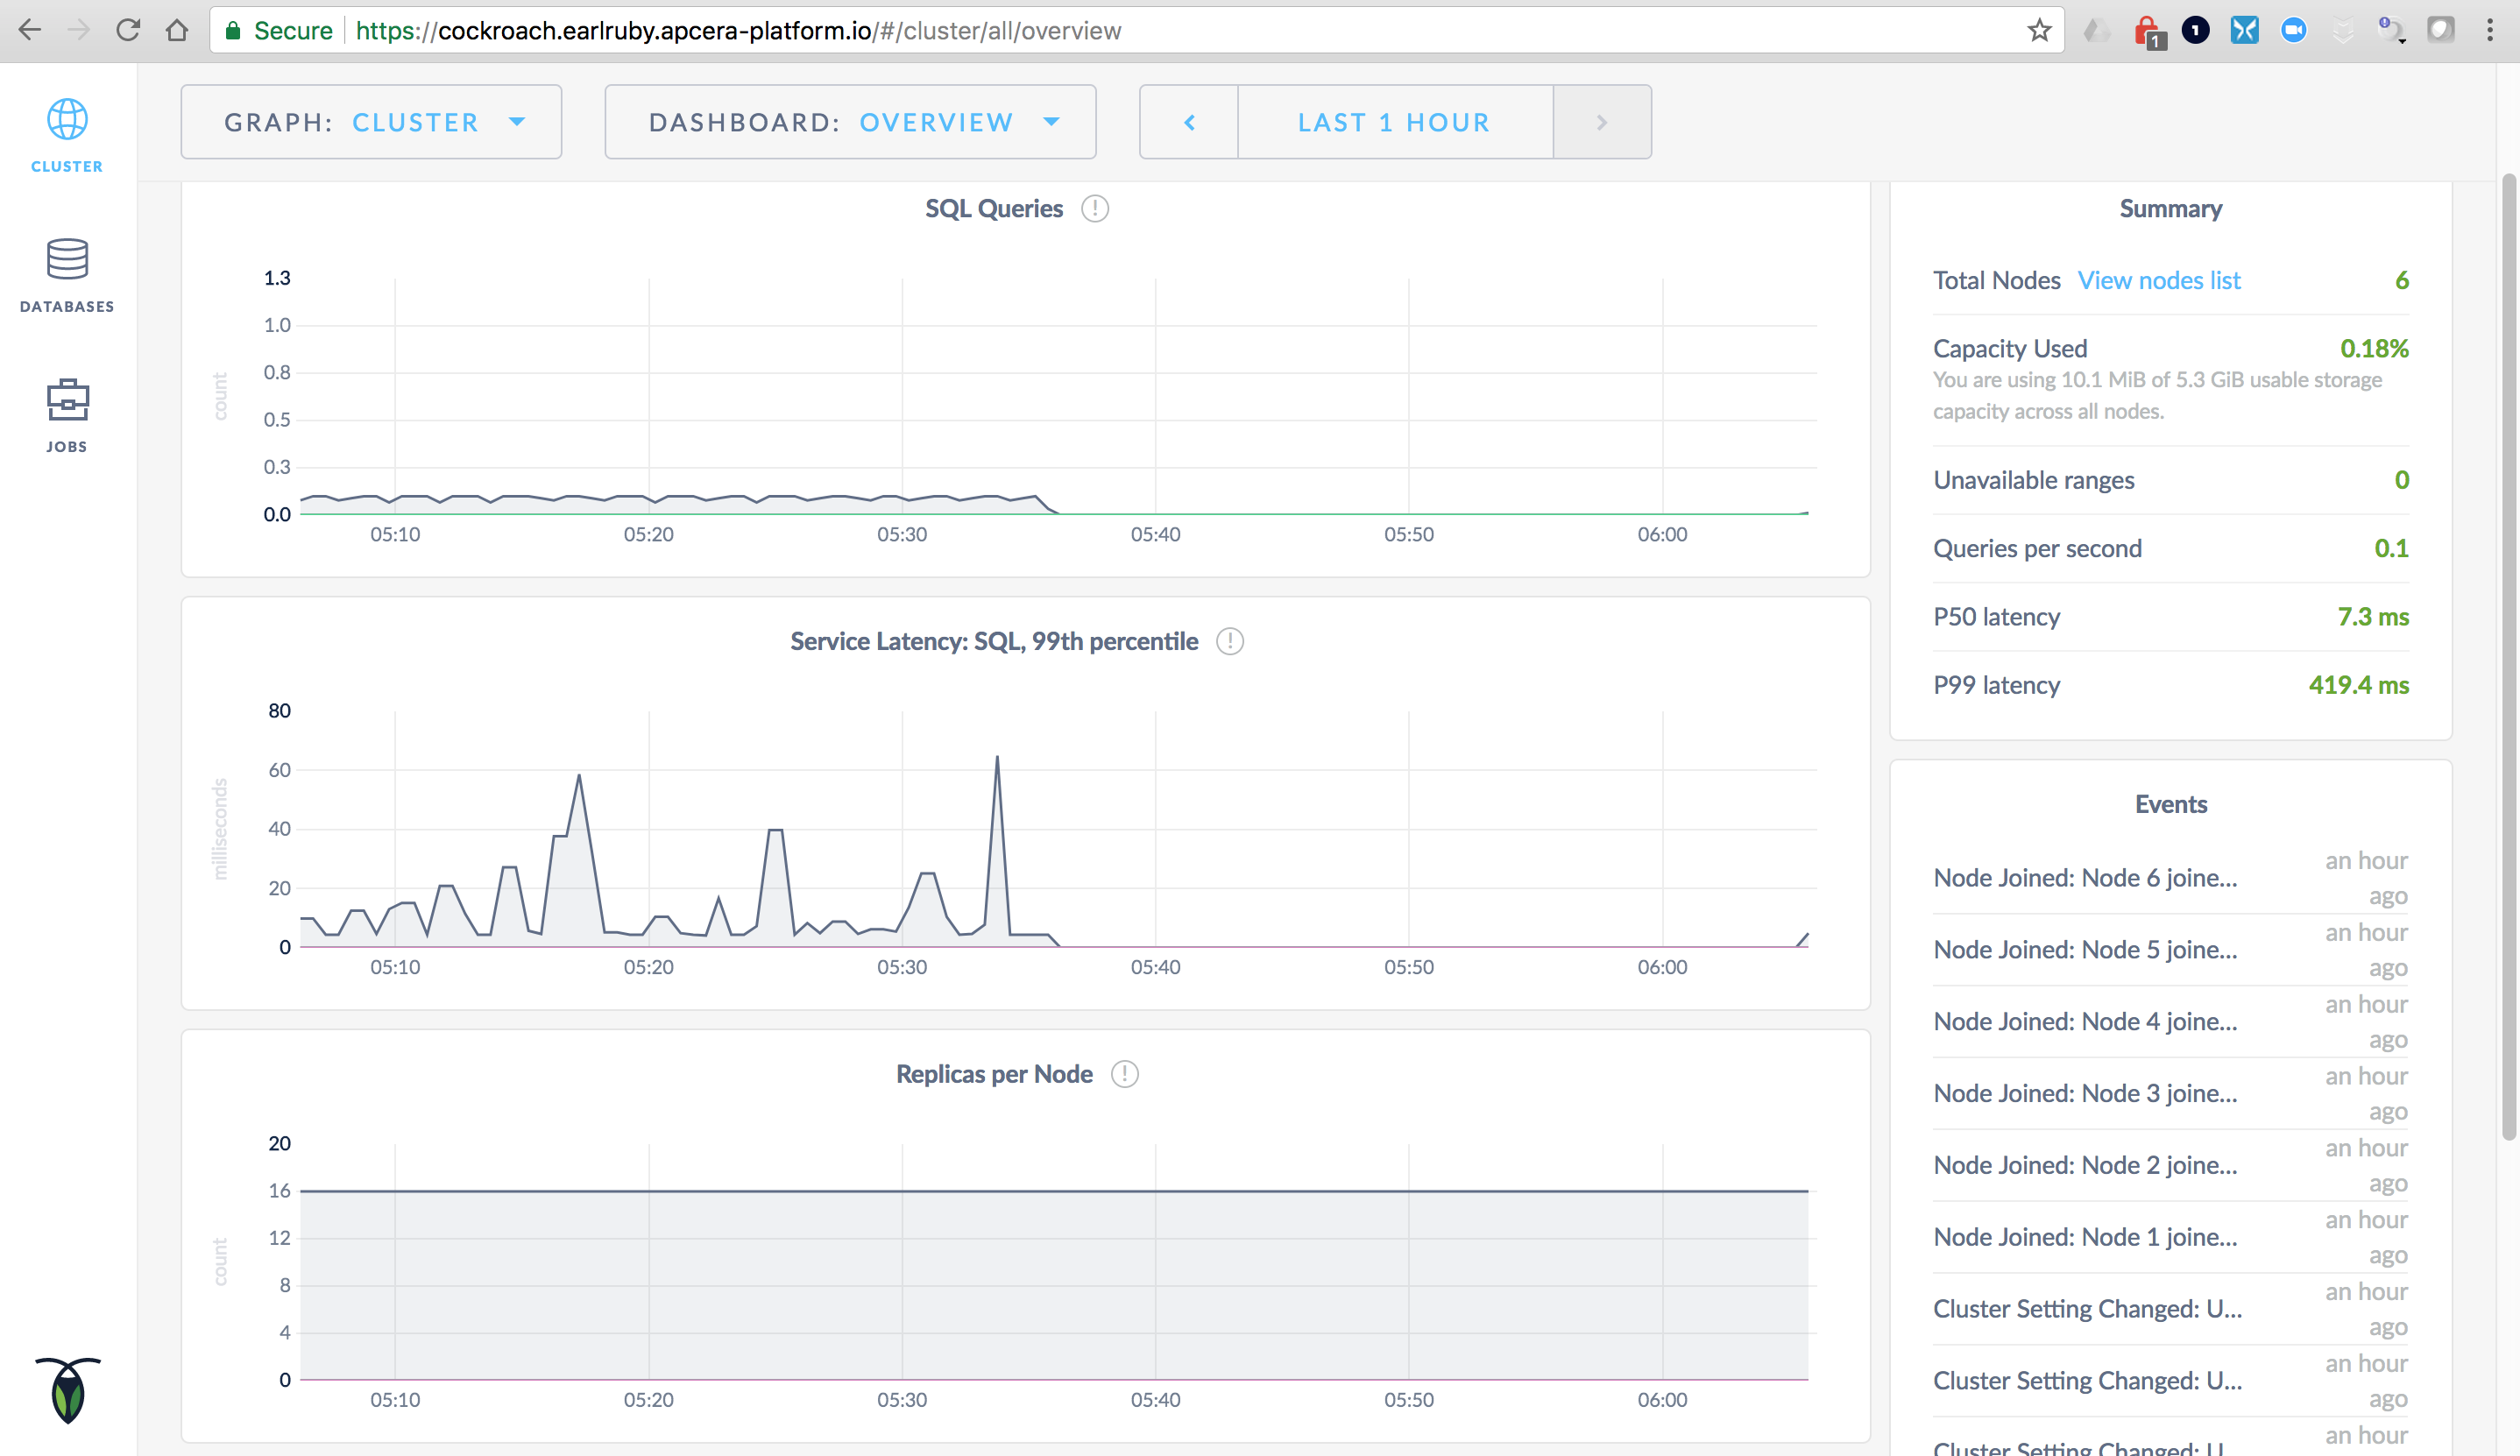
CockroachDB overview screen
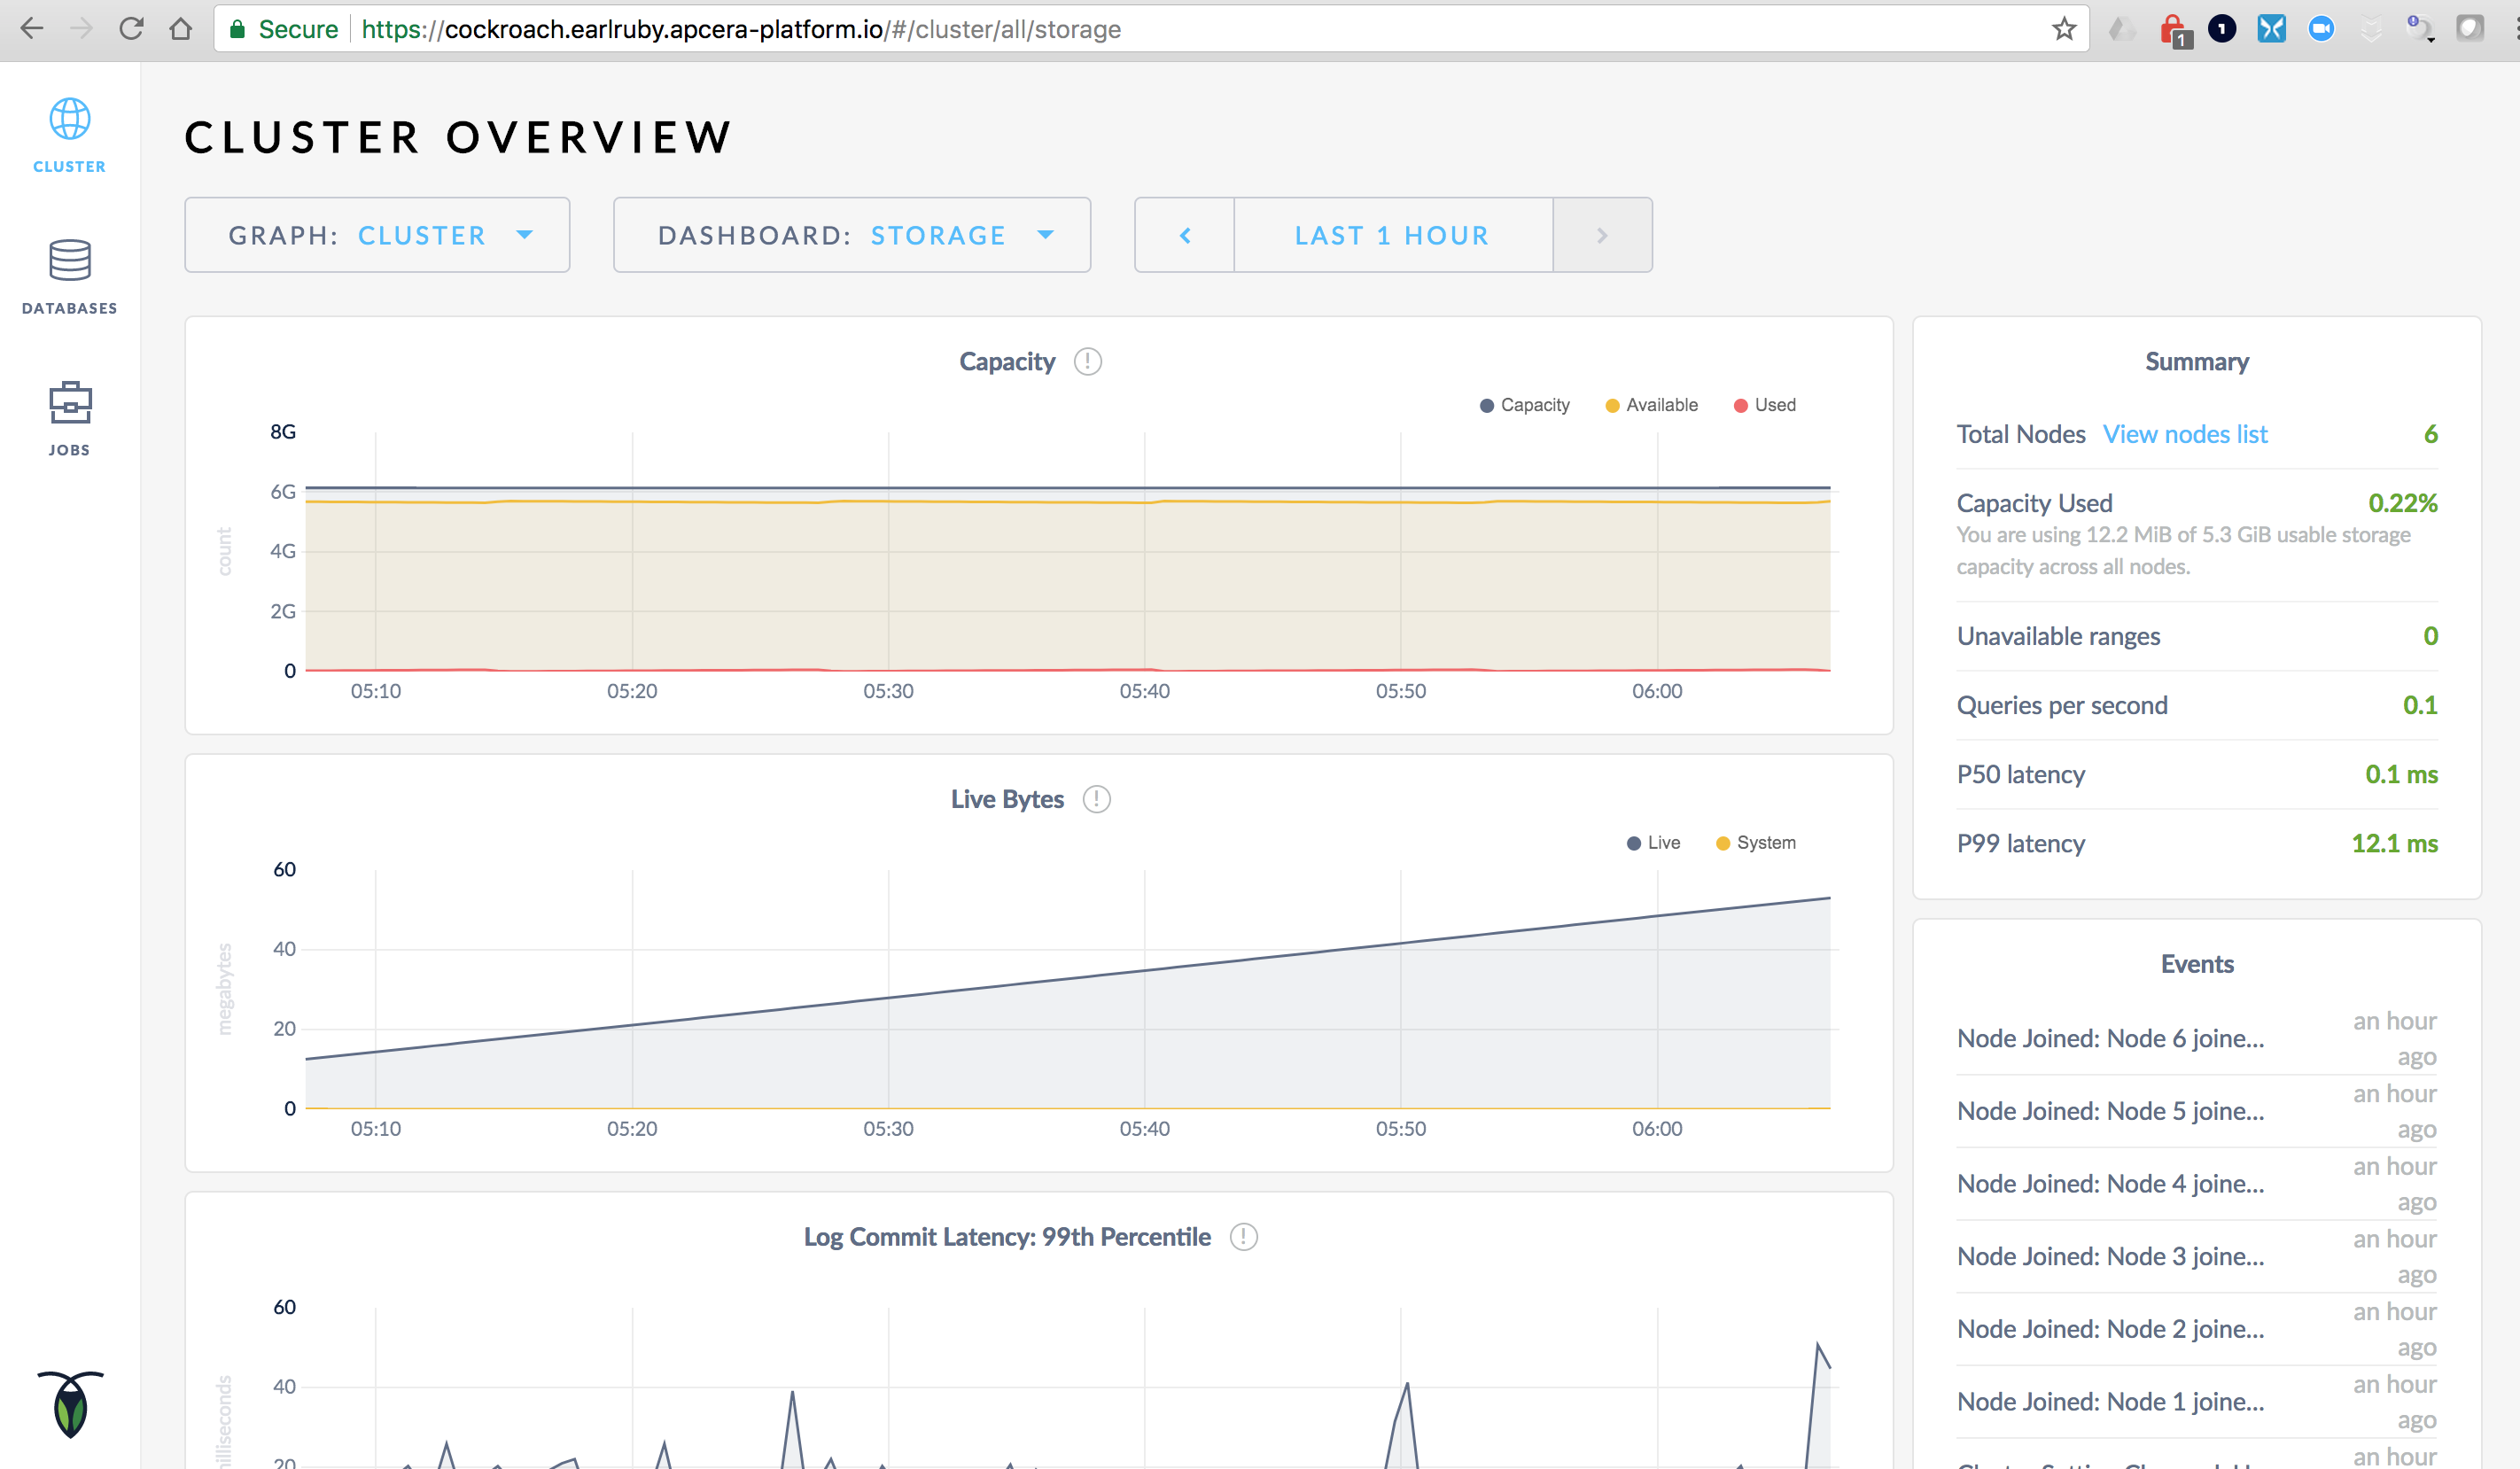
CockroachDB Storage Screen
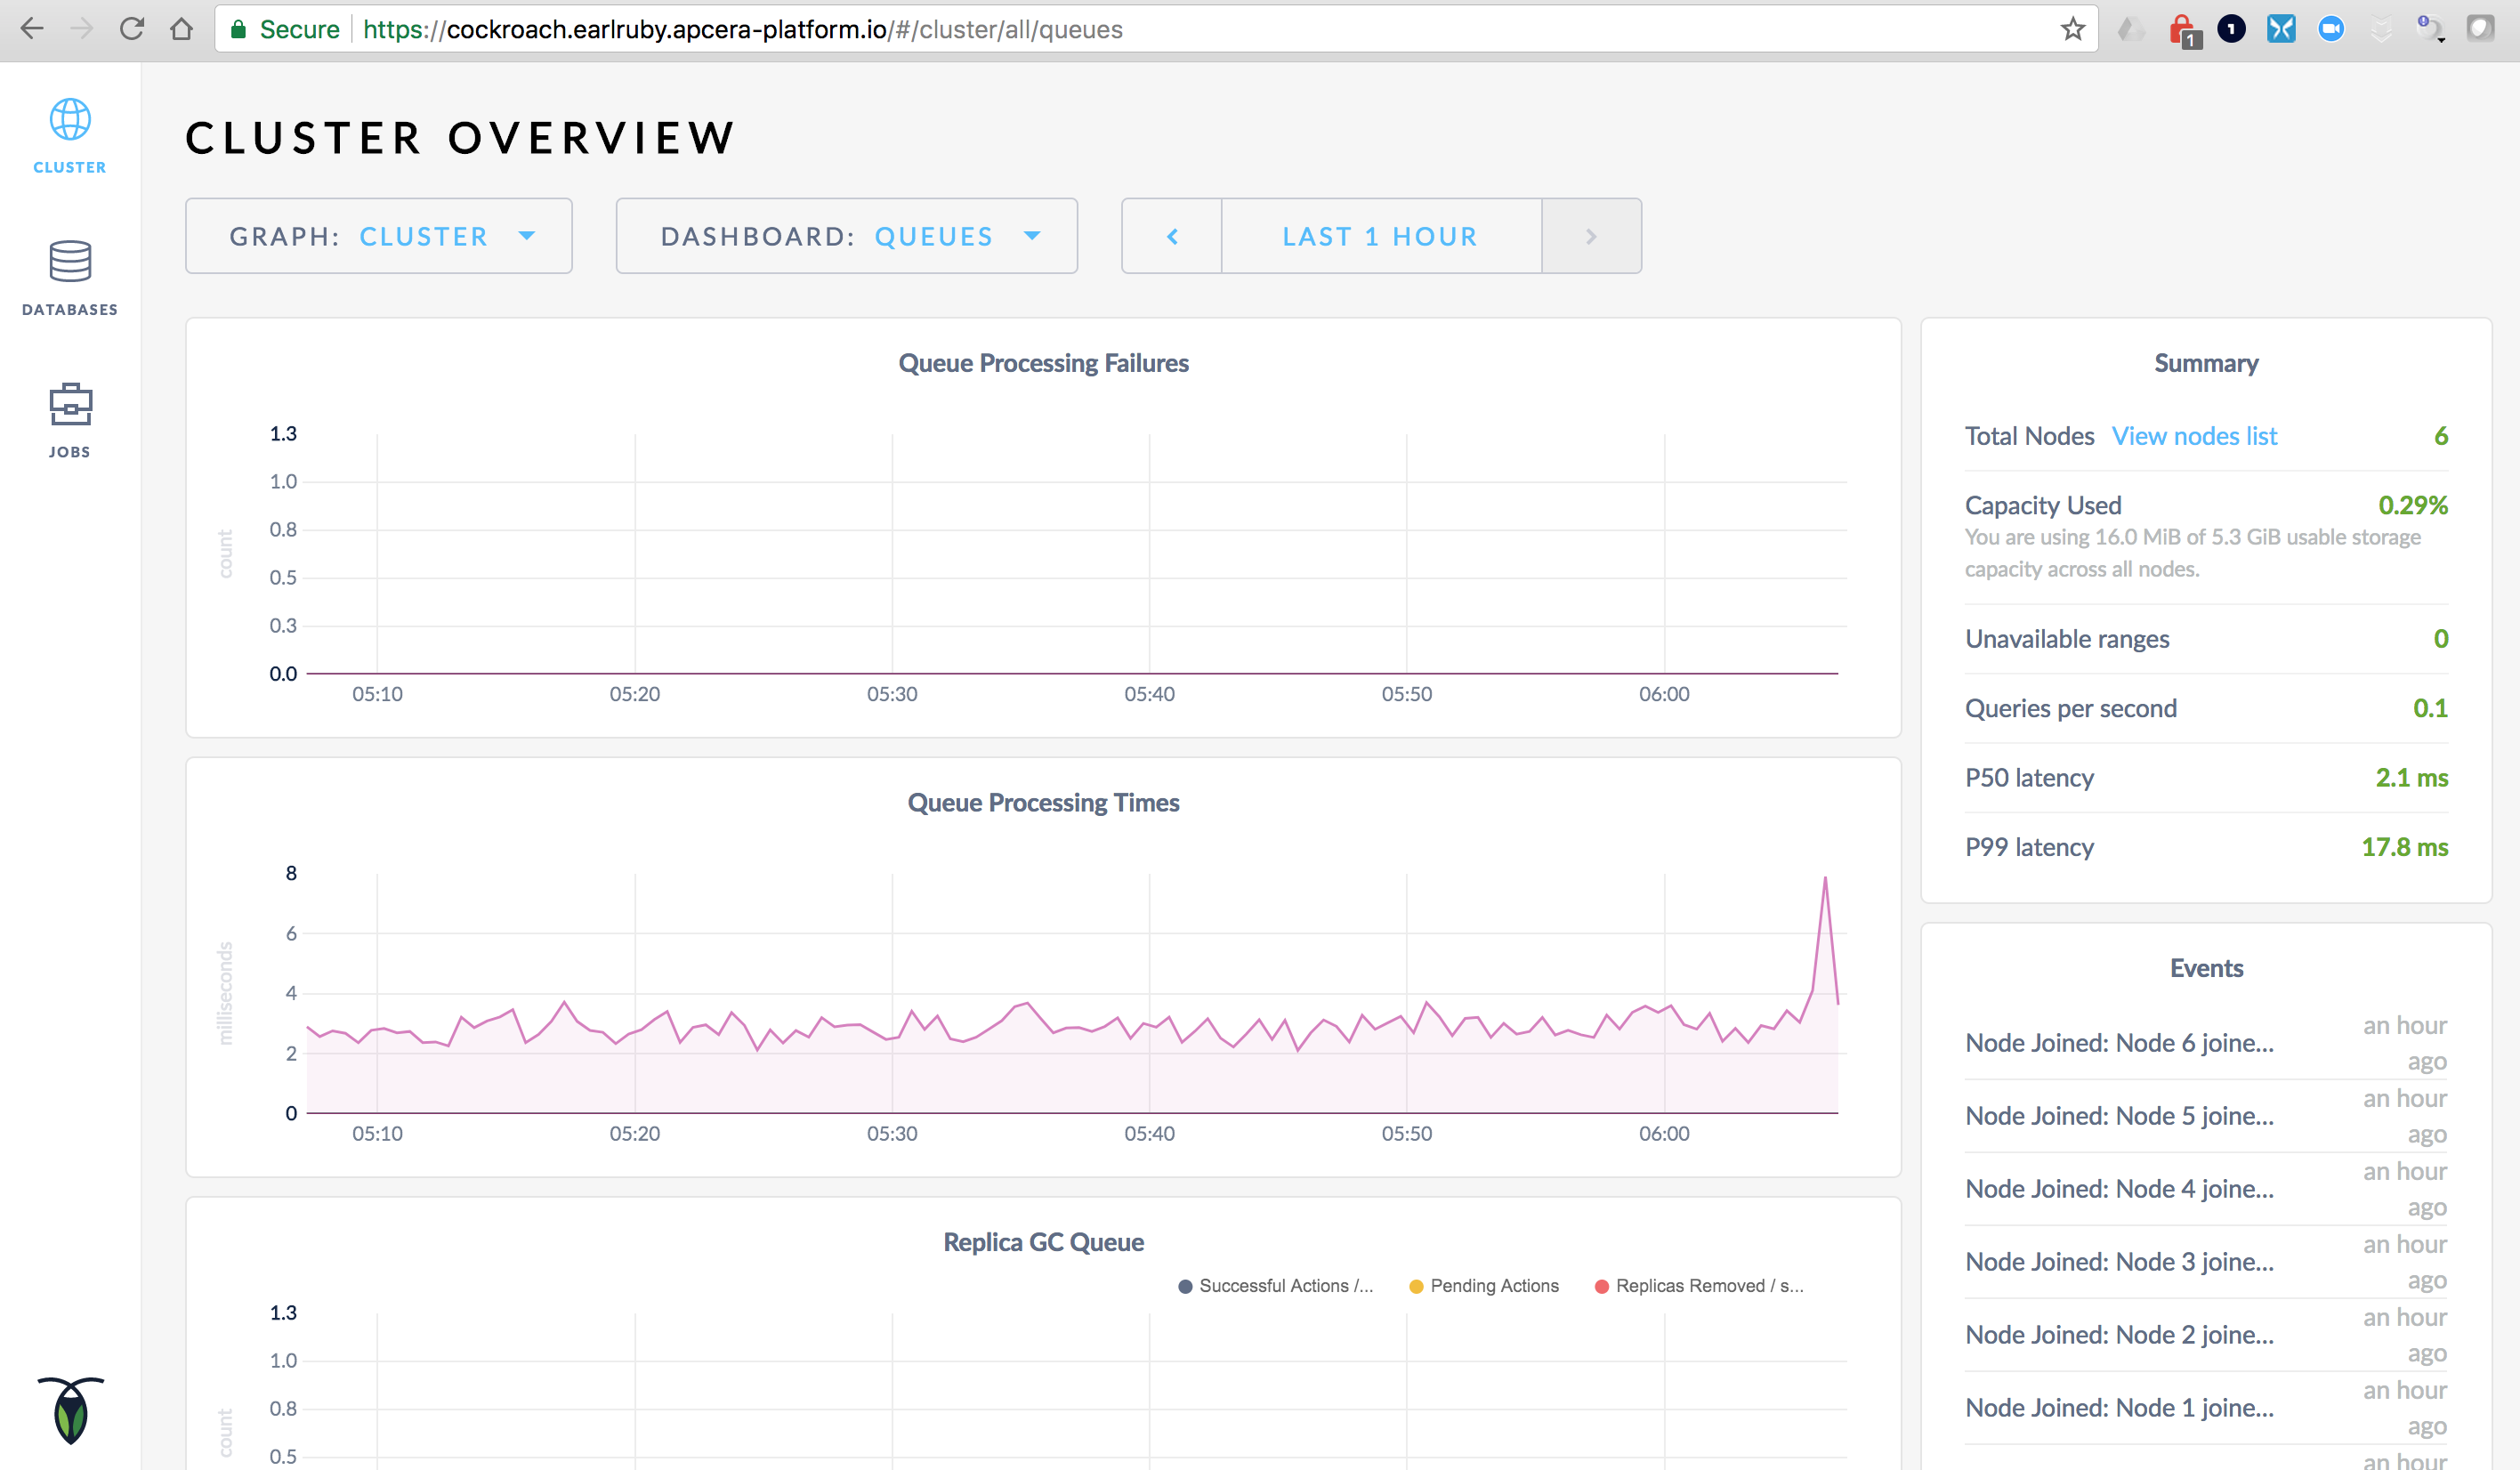
CockroachDB Queues